
Dashboard
Queue restorations, follow progress, and download restored websites.
Start the dashboard
After installation, run:
wayback-restorator webOpen localhost:8080. The server listens only on your
machine at 127.0.0.1:8080.
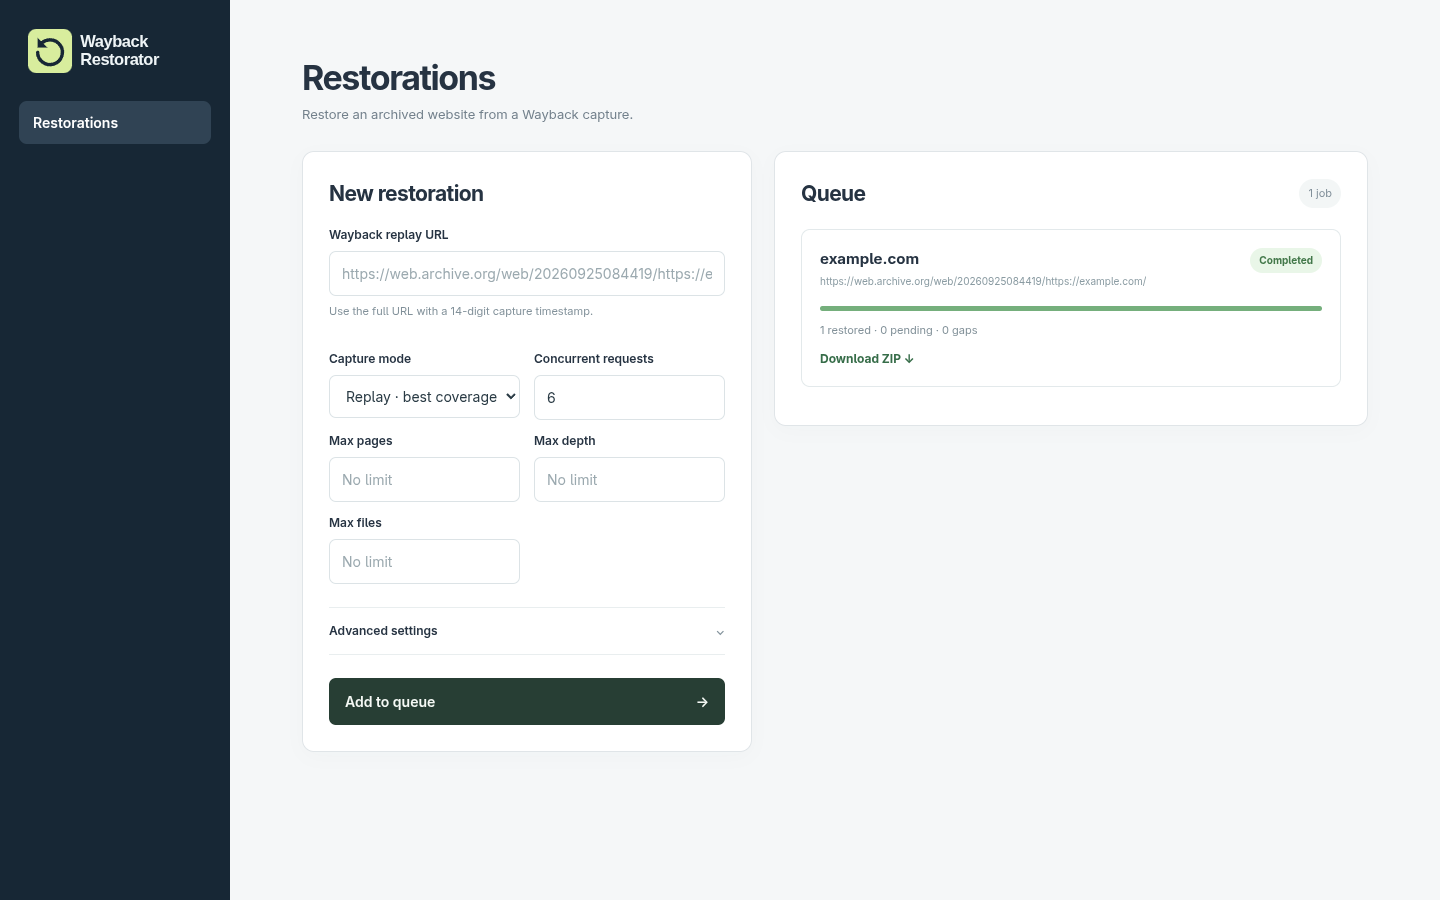
Create a restoration
Paste a capture URL into Wayback replay URL. Choose your settings, then click Add to queue.
The main form includes:
| Field | Default | Purpose |
|---|---|---|
| Capture mode | Replay | Select captures using replay or strict mode. |
| Concurrent requests | 6 | Number of simultaneous requests. |
| Max pages | Empty | Number of pages to discover, including the starting page. |
| Max depth | Empty | Depth of discovered pages from the starting page. |
| Max files | Empty | Number of resources to process in this run. |
Empty crawl fields let the job continue through the discovered site. Expand Advanced settings to set capture windows, request attempts, retry delays, cross-origin assets, and output plugins.
The Configuration reference explains each setting and how capture modes work.
Follow the queue
The dashboard processes one job at a time. Additional jobs remain queued until the running job finishes.
Each job shows its domain, capture URL, status, and resource counters:
- Restored: downloaded resources.
- Pending: resources waiting to be processed.
- Gaps: resources recorded as unavailable in the archive.
The progress bar measures processed resources against those discovered so far. The total grows as pages and stylesheets reveal more links and assets.
Download a restoration
Completed jobs display Download ZIP. The download is named
restoration-<job-id>.zip and contains the restored website.
See Results for job statuses and the accompanying result.json report.
Stop and restart
Press Ctrl+C in the server terminal to stop the dashboard. Start it again from
the same directory to reload the saved queue and job history. Interrupted jobs
return to the queue and continue from their stored progress.
Stored files
The dashboard stores its files in data/ in the directory where you start it:
data/output/jobs/<job-id>/
├── snapshot.zip
└── result.json

data/work/
├── web-jobs/<job-id>.json
└── jobs/<job-id>/
    ├── state.sqlite3
    └── blobs/
ZIPs are available through the download button. Choose other directories with
--output-dir and --work-dir; see Storage.
Change the port
wayback-restorator web --port 8081Open localhost:8081.
Run with Docker
Publish the dashboard port and keep its files in a named volume:
docker run --rm -p 127.0.0.1:8080:8080 -v wayback-restorator:/app/data \
  registry.gitlab.com/restorator-labs/wayback-restorator web --host 0.0.0.0
--host 0.0.0.0 makes the server reachable from outside the container; the
127.0.0.1 port mapping keeps it on your machine. To use another port, change
the first number, for example -p 127.0.0.1:8081:8080.